Manage Semgrep Secrets rules using the policies page
To access the policies page for Semgrep Secrets:
- Log in to Semgrep AppSec Platform and navigate to Rules > Policies.
- Click Secrets.
Global rule behavior
The Global rule behavior page visually represents the rules Semgrep Secrets uses for scanning.
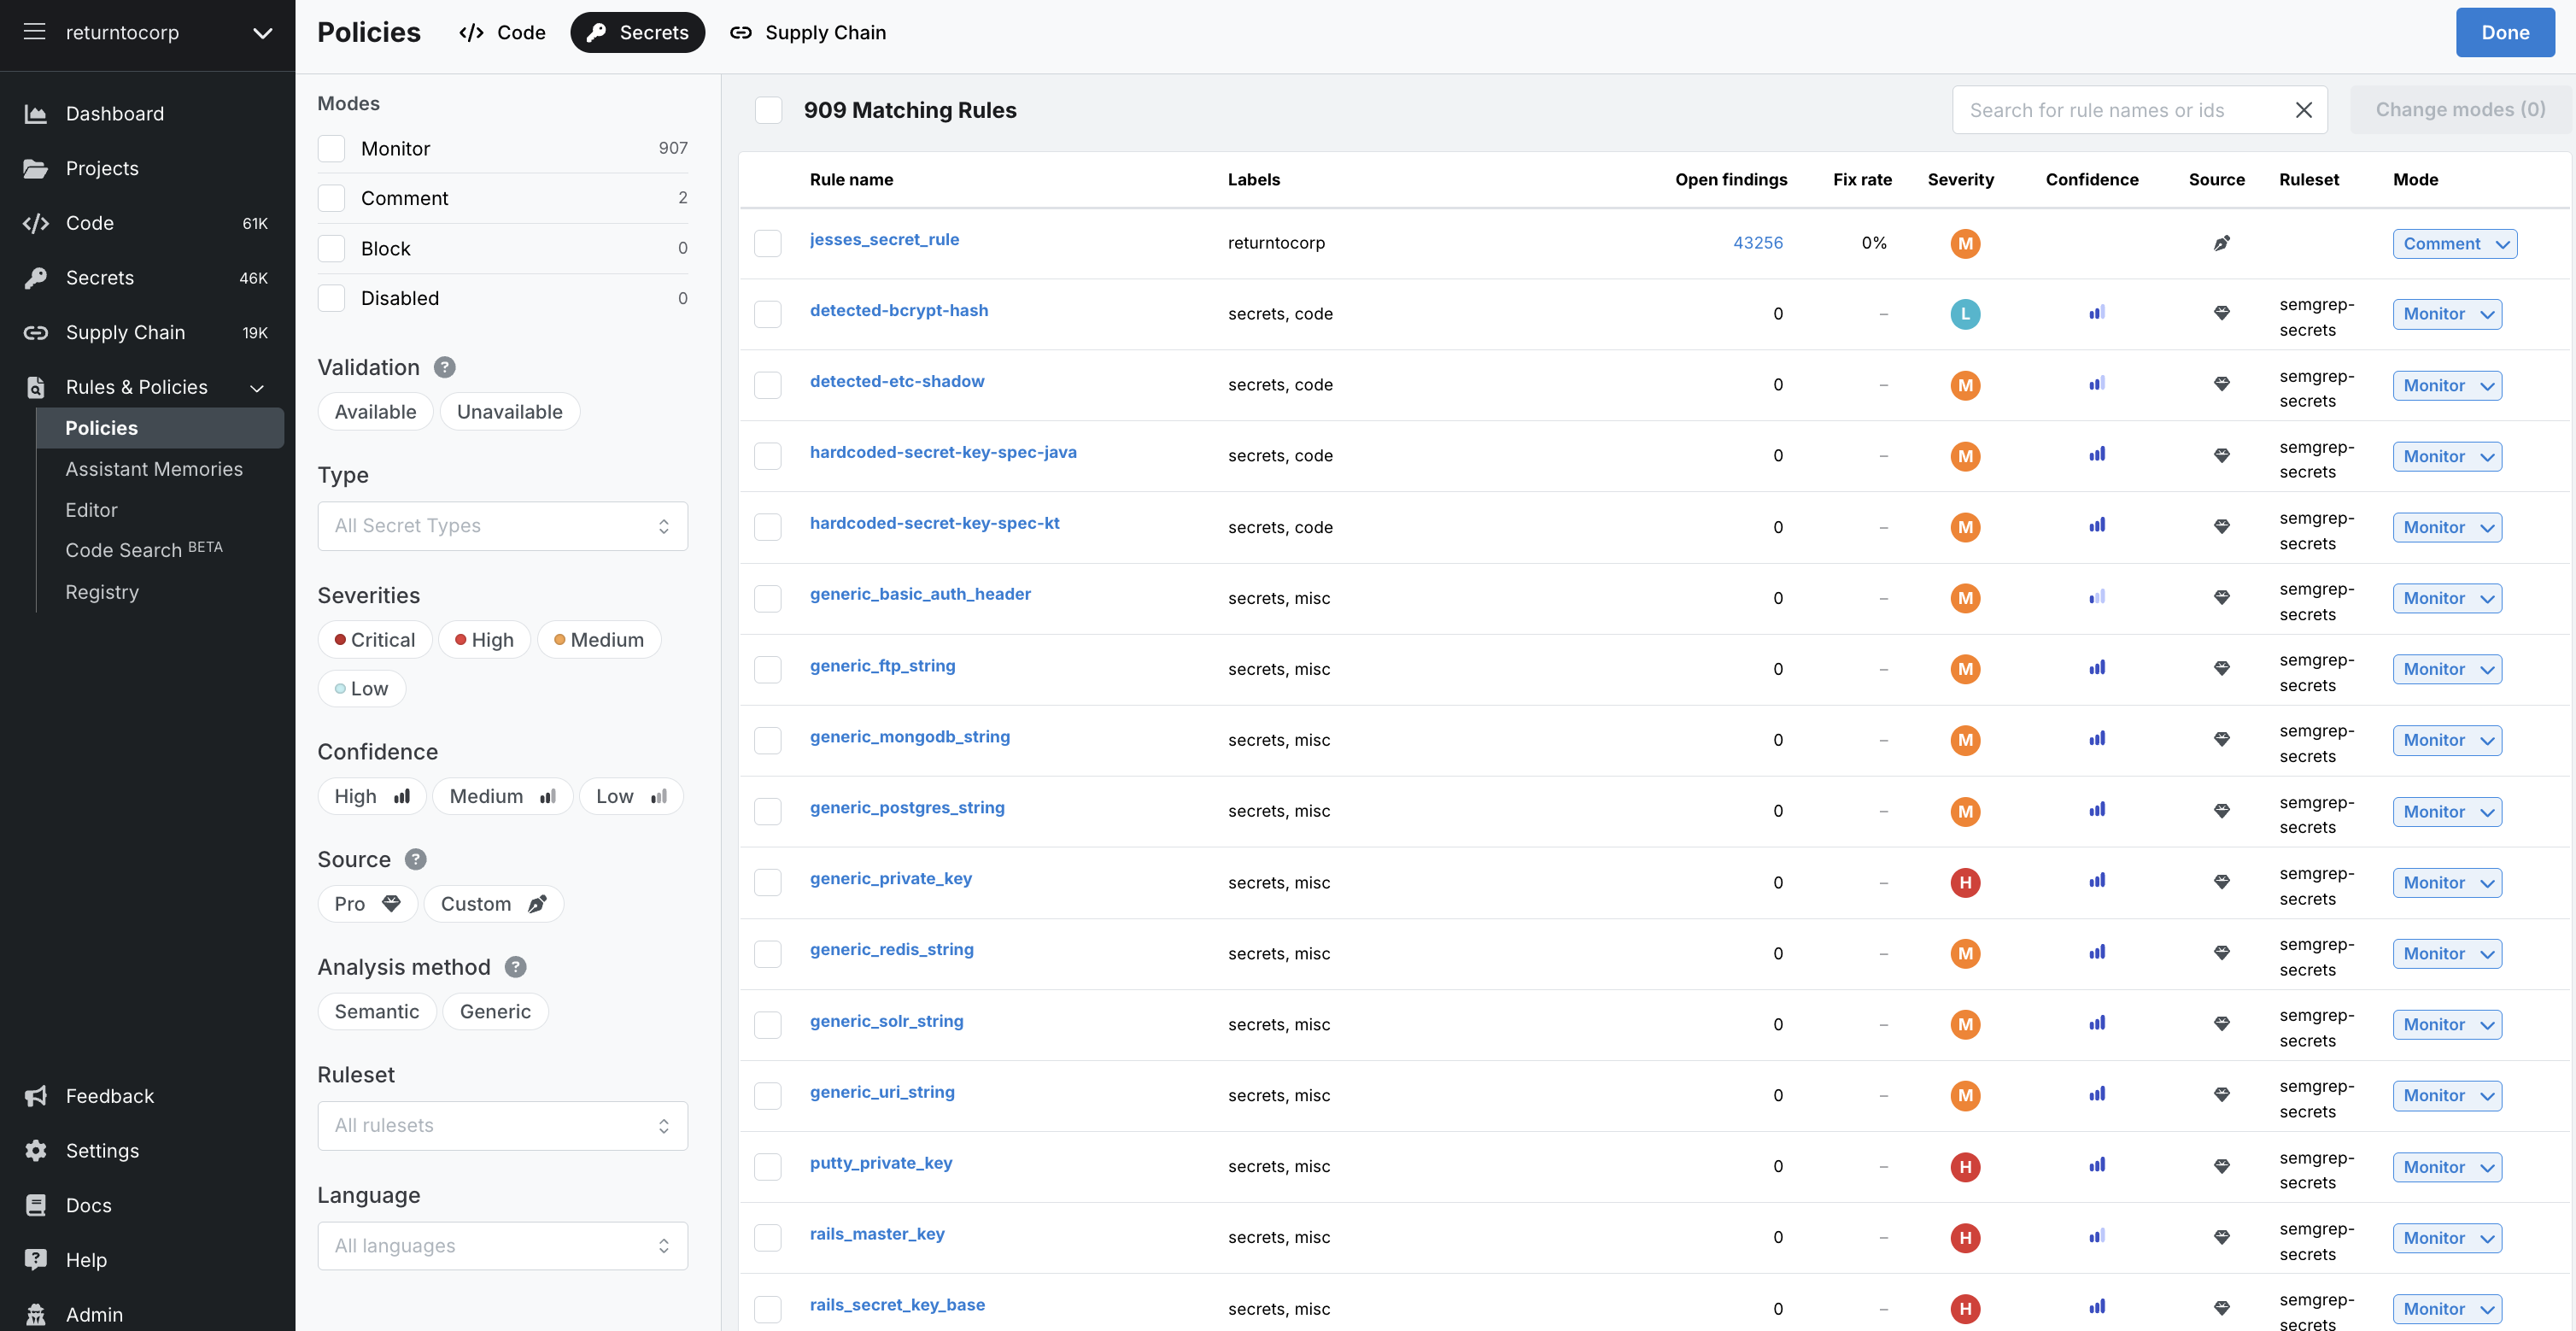
Page Structure
The page consists of the following elements:
- Filter pane
Displays filters to select and perform operations on rules in bulk quickly. See Filters for more information.
- Rules pane
The rules pane displays the rules that Semgrep scans use to detect leaked secrets and allows you to edit their assigned rule modes. You can make these edits either one by one or through the bulk editing of many rules. You can also use the Search for rule names or ids box. See Filters for more information.
Filters
The filter pane displays filters to select and perform operations on rules in bulk. The following filters are available:
| Filter | Description |
|---|---|
| Modes | Filter by the workflow action Semgrep performs when a rule detects a finding. An additional filter, Disabled, is provided for rules you have turned off and are no longer included for scanning. |
| Validation | Filter by whether the rule includes a validator or not. |
| Type | Filter by the type of secret the rule addresses. Examples: AWS, Adobe, DigitalOcean, GitHub, GitLab. |
| Source | Filter by Pro rules (authored by Semgrep) or by Custom rules (rules created by your organization) |
| Severities | Filter by the severity level of the secret:
|
| Analysis method | Filter based on whether Semgrep used Semantic or Generic analysis |
Rule entry reference
This section defines the columns of the rule entries in the Policies page:
| Filter | Description |
|---|---|
| Rule name | Name of the rule Semgrep Secret uses for scanning. |
| Labels | Metadata describing the rule, including the service for which the rule is applicable. |
| Open findings | The number of open findings the rule detected across all scans. |
| Fix rate | The percentage of findings that are fixed through changes to the code. |
| Severity | The higher the severity, the more critical the issues that a rule detects. |
| Confidence | Indicates confidence of the rule to detect true positives. |
| Source | Indicates the origin of a rule.
|
| Ruleset | The name of the ruleset the rule belongs to. |
| Mode | Specifies what workflow action Semgrep performs when a rule detects a finding. An additional filter, Disabled, is provided for rules you have turned off and are no longer included for scanning. |
Rule modes
Semgrep Secrets provides three rule modes. These can be used to trigger workflow options whenever Semgrep Secrets identifies a finding based on the rule:
| Rule mode | Description |
|---|---|
| Monitor | Rules in Monitor mode display findings only in:
|
| Comment | Rules in Comment mode display findings in:
|
| Block | Rules in Block mode cause the scan job to fail with an exit code of 1 if Semgrep Secrets detects a finding from these rules. You can use this result to enforce a block on the PR or MR. For example, GitHub users can enable branch protection and set the PR to fail if the Semgrep step fails. These rules display findings in:
|
If you're encountering issues getting PR comments for Semgrep Secrets:
- Make sure the rule is in Comment or Block mode
- Review the PR or MR comments guide for your SCM
- Explore other reasons you may not see PR or MR comments
Block a PR or MR through rule modes
Semgrep enables you to set a workflow action based on the presence of a finding. Workflow actions include:
- Failing a CI job. Semgrep returns exit code
1, and you can use this result to set up additional checks to enforce a block on a PR or MR. - Leaving a PR or MR comment.
- Notifying select channels, such as private Slack channels or webhooks.
You can trigger these actions based on the rule mode set for the rule.
Add custom rules
To add custom rules, use the Semgrep Editor. See Semgrep Secrets rule structure and sample.
Disable rules
To disable rules:
- On the Policies page, select either:
- The top Number Matching Rules checkbox to select all rules.
- Select individual checkboxes next to a rule to disable rules one by one.
- Click Change modes(Number), and then click Disabled.
You can also select individual rules under the Mode column and disable them individually.
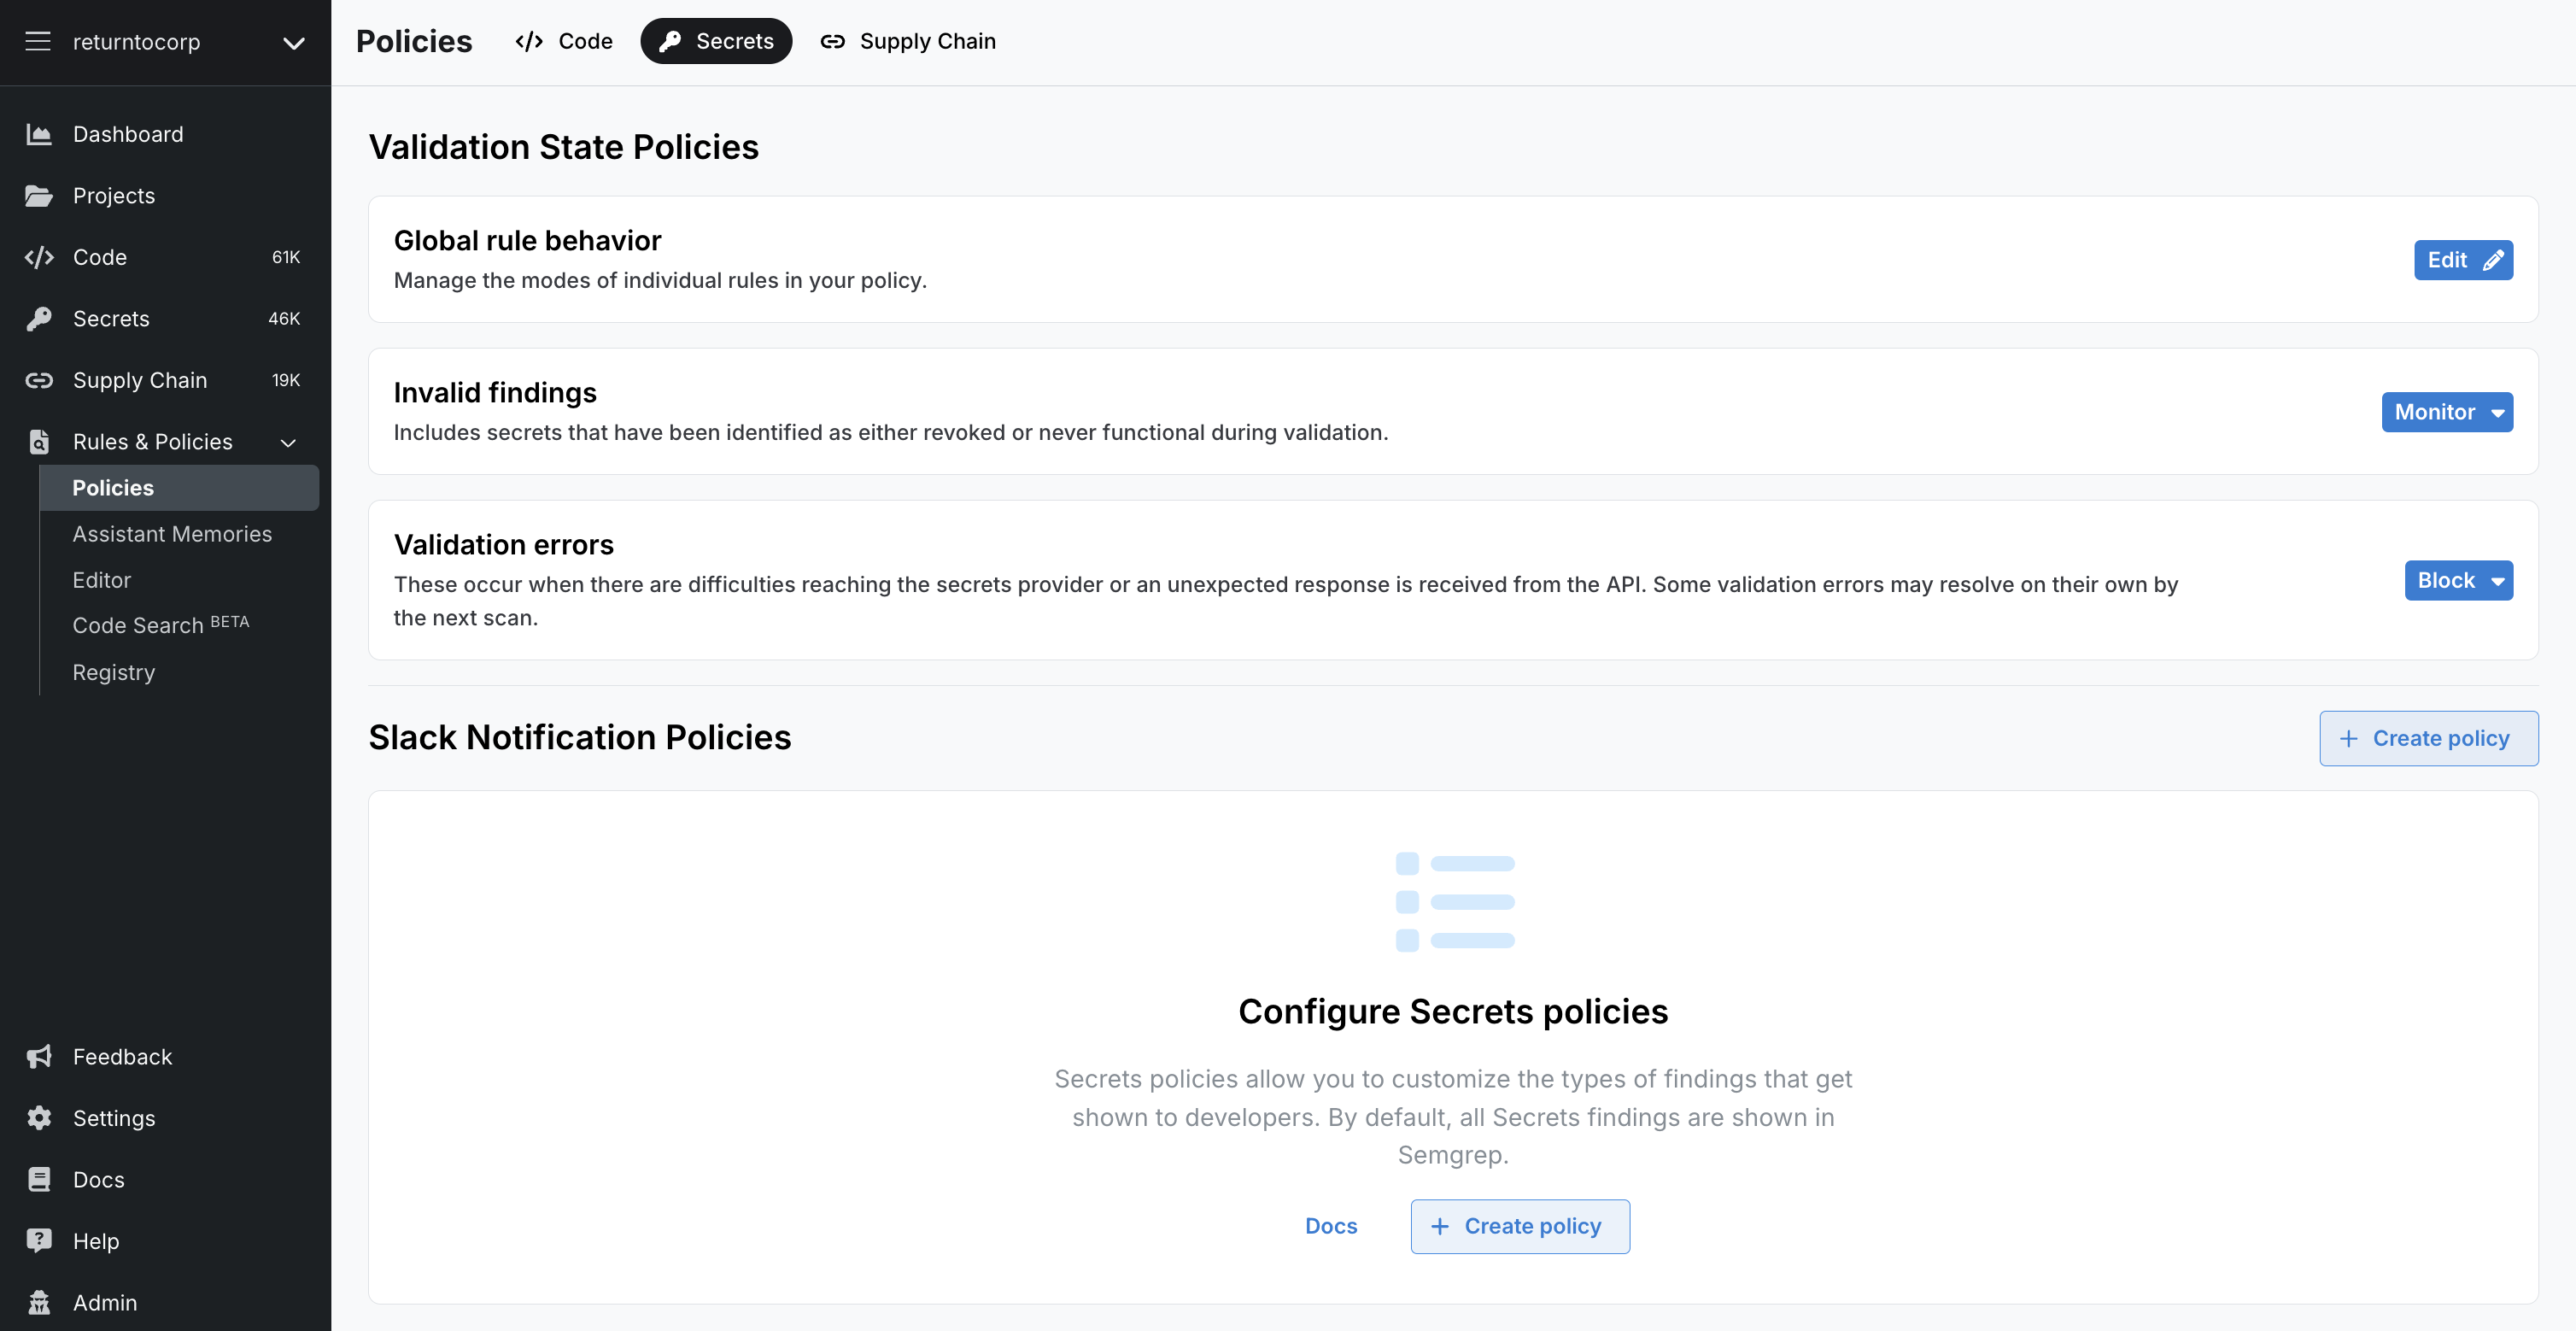
Invalid findings
You can define how Semgrep handles findings that it categorizes as invalid. Invalid findings include secrets that, during validation, were identified as revoked or were never functional.
Validation errors
You can define how Semgrep handles findings that result in a validation error. Validation errors occur when there are difficulties reaching the secrets provider or when Semgrep receives an unexpected response from the API.
Manage Policies
Once you are ready to notify developers of Secrets findings on Slack, define a Secrets policy. This feature helps you manage noise and ensures that developers are only notified based on the conditions you set.
This feature enables you to configure the following:
- Scope: These are the projects (repositories) that are affected by the policy.
- Conditions: The conditions under which actions are performed. These conditions are typically attributes of a finding, such as severity or validation.
- Actions: Actions that are performed on the defined scope when conditions are met.
You can create as many policies as you need.
Prerequisites
This feature requires the semgrep:latest Docker image or at least version 1.101.0 of the Semgrep CLI.
View your policies
Only admins can view, create, edit, or delete policies. Your policies are arranged as cards.
 Figure. A single card within the Semgrep Secrets Policies page.
- To view and edit an existing policy, click its name or the three-dot ellipsis () > Edit policy.
- View a popup of a policy's scope (affected projects or tags) or a summary of its actions and conditions by clicking on the two summary links beside the policy name.
Create a policy
-
From the Slack Notification Policies section, Click Create policy.
-
Provide a Policy name.
-
Define the scope of the policy:
- Click the drop-down box to select between All Projects, Project, or Project tag. Note that you can only select either a scope based on projects or tags, but not both.
- For Project or Project tag values, a second drop-down box appears. Choose the projects or project tags to finish defining the scope.
-
Define the conditions of the policy. See the Policy conditions section for more information. You can create more than one condition by clicking Add condition.
-
For each condition, you can select multiple values by clicking on the plus sign () on the same row. The policy is applied when any of those values are met (
OR). -
Each additional condition is additive. The policy is applied when all conditions are met (
AND).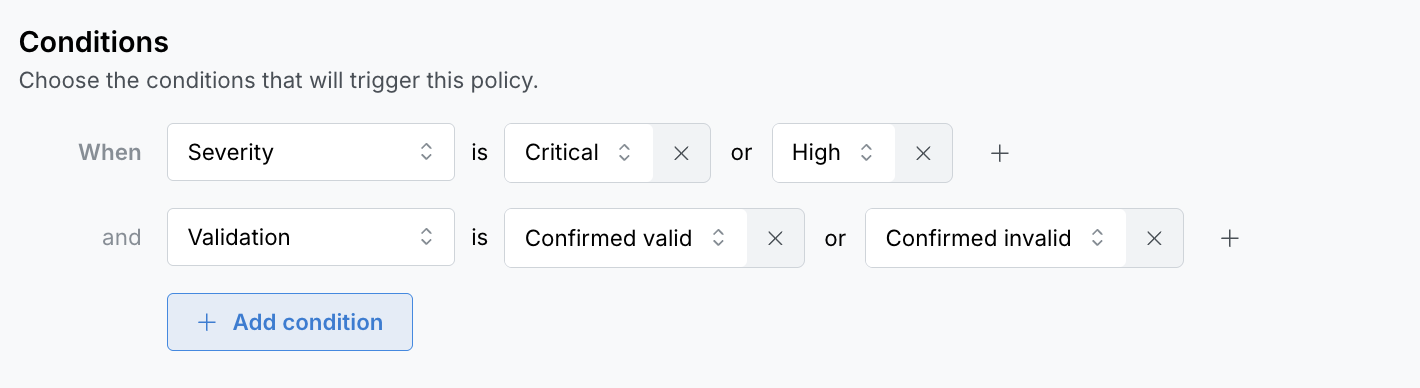
-
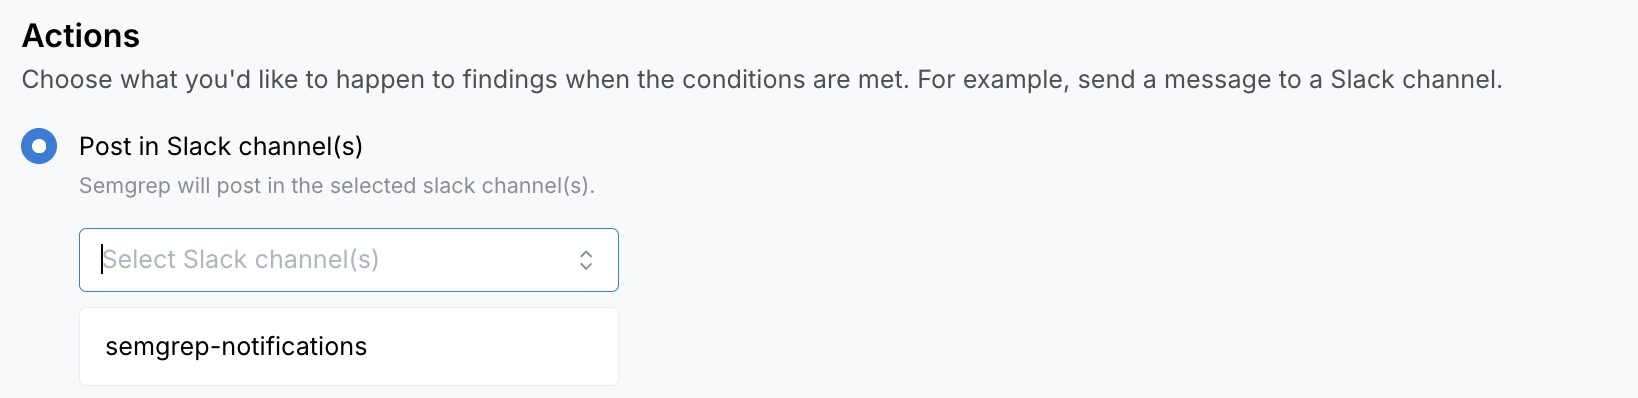
-
Define the actions of the policy. You can choose to Post in Slack channel(s). Select which channels should receive notifications when this policy is triggered.
- This list is populated by the channels you have subscribed to. To change this list, follow the steps listed in Receive Slack notifications
-
Click Save. This brings you back to the Secrets policies tab.
-
After creating a policy, it is not automatically enabled. Click the toggle to enable a policy. This applies the policy to future scans.
Policy scopes
A policy's scope can consist of tags or projects, but not both. If you need to create a policy with both tags and projects, simply make another policy.
If a project or project tag that's included in a policy scope gets deleted, it is removed from the policy scope. If all projects or all project tags are deleted for a given policy, you must edit the policy for it to be applied to a valid scope.
Policy conditions
The following table lists available conditions and their values:
| Condition | Values |
|---|---|
| Severity |
|
| Validation |
|
| Repository Visibility |
|
| Secret type | Manually provide a Secret type or choose from a list of values. The values listed are generated from findings identified by Semgrep Secrets. |
Other operations
Edit a policy
- From the Secrets policies tab, click the three-dot (...) button > Edit policy for the policy you want to edit. This takes you to the specific policy page.
- Make your changes.
- Click Save.
Disable or enable a policy
From the Secrets policies tab, click the toggle for the policy you want to edit.
You can also disable or enable a policy from the policy's page:
- From the Secrets policies tab, click the three-dot (...) button > Edit policy.
- Turn off or on the Enable policy toggle.
- Click Save.
Delete a policy
From the Secrets policies tab, click the three-dot (...) button > Delete policy, then click Remove.
Note that this does not remove existing notifications.
Not finding what you need in this doc? Ask questions in our Community Slack group, or see Support for other ways to get help.